Wednesday, December 31, 2008

Challah for lazy people.

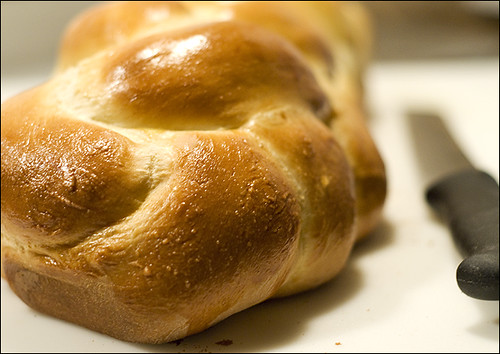
I might be converting to Judaism, but my family isn't so I attended 2 Christmas dinners this year - one with my mom and one with my dad. Because my mom is interested in my conversion and wants me to share all of the stuff that I'm learning with her, I decided that she might be happy to try some of my newly aquired Jewish recipes. I baked a loaf of challah and brought it with me to our Christmas dinner. She loved it and saved the leftovers to make sandwiches with (there weren't many because my sister also got excited about the challah: "Is this that Jewish bread? I love this stuff!").

It still requires work, but making your challah dough in the bread machine saves you some of the hassle. I do most of my bread doughs in the bread machine. It's just easier and I've never noticed a decline in taste or quality. Then again, it's not like I'm a bread connoisseur or anything.


So here we go with the recipe:

BREAD MACHINE CHALLAH

Ingredients:
1 cup water
2 egg yolks
1 egg
4 tbsp butter (or shortening if you want it to be parve)
3 tbsp sugar
1-1/4 tsp salt
3-3/4 cups white flour
1 tsp bread machine yeast

Method:
1. Measure first 8 ingredients in the order listed into your bread maker.
2. Select the dough/pasta setting and press start.
3. When the cycle is complete, remove dough from machine to a lightly floured surface.
4. Divide dough into 6 equal portions. Roll with palm of hand into long smooth strips. The pieces should be thicker in the middle and gradually taper towards the ends. Braid the 6 dough strips. Place on lightly greased baking sheet.
5. Cover and let rise for 30 minutes or until double in volume.
6. Beat another egg and brush over challah. Bake at 350F for 30-35 minutes.

Notes:
-I like to make things slightly more healthy by using a combination of white and whole wheat flour, but you really can't do that with this one. You need to use all white flour to get the right texture.
-If you need help figuring out how to braid your challah, there's a great video here!

Thursday, December 25, 2008

Costa Rica, and the quest for Yuca Latkes.


Toucan.  Not King Billed...  What's the other?
A Chestnut-Mandibled Toucan... Not a King Billed Toucan, which is what Toucan Sam is.

R and I were in Costa Rica last week, so I wasn't able to wish you all a Happy Hanukkah on the first night. But here I am, finally: Home in Canada where the snow is plentiful. Our flight home was delayed by 2.5 hours and we got home at 5am on Tuesday morning. I'm sure that I'm still trying to catch up on the sleep that I missed because of this.

We pretty much only did two things in Costa Rica: We hiked and we ate. We stayed mostly inland (where it's not especially hot) and spent our time near Lake Arenal where there's an active volcano that erupts more than once a day, and in the Monteverde Cloud Forest Reserve, where there a a lot of really cool birds and animals.

There were a few things about their traditional cuisine (or, as they call it, "typical food") that I really loved, but I'll stick to the things that you could probably bring into a kosher kitchen (and if any of this is definitely NOT kosher for some reason, please comment and let me know!):


Yuca: This was my favourite. For breakfast at one of our hotels, we were served little discs that looked a lot like potato latkes. After taking a bite I got curious and asked the women in the kitchen what it was made of. Yuca! Yuca is a tuber and is used in place of potatoes in Central America because it's more readily available. We had yuca in a number of different ways, but my favourite was definitely the yuca "latkes". I'll definitely be working on a recipe for those in the weeks to come, but if anyone has one to share I'd sure appreciate it!

Heart of Palm: I'd never had it before we went to Costa Rica and it's great. The flavor is hard to describe, but the texture is firm yet smooth. It's crunchy, but not in the same way that a carrot or a piece of celery is crunchy. It's really good, but it's apparently very expensive to buy in North America. Once I have a chance to go to the Asian or Latin American market near my house I'll confirm or deny this.

Guanábana: Called Soursop in some places, guanábana is a huge fruit that is green on the outside and white with large black seeds on the inside. Because of the seeds, the flesh is difficult to eat and the fruit is usually blended with water to make a smoothie of sorts. We drank guanábana con agua just about every day that we were on vacation. It has a really unique taste and you could compare it to coconut or banana or strawberry, but it doesn't really taste like any of those things. In Costa Rica it's pretty common to find guanábana flavoured Tang in grocery stores, which I thought was really funny for some reason.

Gallo Pinto: Directly translated, gallo pinto means "spotted rooster", which is cute because that's kind of what it looks like. Gallo pinto is rice with black beans and I think that I ate more beans and rice during my stay in Costa Rica than I ever have in my life. They serve gallo pinto with almost every meal, and it made a great breakfast when we were heading out for a big hike because it's full of carbs and protein. I liked eating mine with scrambled eggs and fresh avocado. The avocado in Costa Rica is amazing because it's actually tree ripened, instead of on-your-counter-in-a-brown-bag ripened.


The poor man's umbrella
Poor Man's Umbrella in the Monteverde Cloud Forest Reserve.


Tuesday, December 9, 2008

Challah. Holla!

Yes, I made my first challah on the weekend. I cheated a bit and made the dough in my bread machine, but I braided and baked it myself. The texture was fantastic but it wasn't as egg-y as I was expecting it to be. I think that I need a better recipe. I'm not even happy enough with this one to post a recipe at all. But I will share the video that I used to figure out how the HECK I was supposed to make a six-braid challah:


That was definitely helpful, but even after that I had to get R to help me with it because I couldn't wrap my brain all the way around the idea. I'm too used to braiding hair. Braiding bread is pretty different!

challah.  holla!


I've been pretty busy in the kitchen lately, but I've been busy everywhere so it's hard to find the time to post about my creations. We're leaving for a trip to the Cloud Forests in Costa Rica on Monday, but I'll try to squeeze another post in before then.

Tuesday, November 25, 2008

Beef and Lamb Holishkes (Cabbage Rolls)

I found a great article today on TheKnish.com today about a guy who ate nothing but Jewish foods for a month and apparently became incredibly healthy while doing so.

Just another reason to follow my blog, folks!

Honestly though, I'd take the article with a grain of kosher salt. I'm not entirely convinced that eating a steady diet of Jewish food would be better for me than my current diet, but I'm sure that Jewish food nourishes me in a different way.

In order for me to explain what I mean, I should tell you that I've started my conversion classes. I've been reading about Shabbos (the Sabbath, or the Holy Day - a day of rest sort of like Sunday for Christians) and the process of a typical Shabbat dinner, and I'm pretty excited about doing all of that soon.

I think that it's interesting that there are so many brachot (blessings) that can be said over food; not just on Shabbos, but every day. Jews have blessings for everything: Sugar, spices, nuts, ripe fruit, new fruit, wine, challah/bread, cakes, juice, and on and on forever. To me, this is just more proof that the Jews adequately enjoy and appreciate their food. And not only that, but their food doesn't just nourish their bodies, it nourishes their souls and gives meaning to their meals. Thanking G-d for a meal reminds you that it is not there just because you cooked it. It creates a moment for you to pause and truely appreciate your food and, essentially, your life.

Now you understand why I say that Jewish food nourishes me in a different way.

Here's a great recipe for beef and lamb holishkes and will nourish both your body and your soul. R would like me to point out that this is
his recipe, not his bubbe's or my own. :) He likes to get creative with his cooking and he loves ground lamb, but he made this recipe with only lamb once and found that the taste was incredibly overpowering. The combination of beef and lamb is wonderful, though.


They may not be the most photogenic little things, but I assure you that the taste more than makes up for it.

Ingredients:

1 head of green cabbage
1 can of tomato paste
3 cups of water
Meat mixture for stuffing

Meat Mixture:
1 lb lean ground beef
1/2 lb ground lamb (if not available, just increase ground beef to a total of 1.5 lbs)
red chili flakes (a few shakes)
1 large carrot, diced
4 cloves garlic, diced
1/2 white onion, diced
1 can whole tomatoes
1/4 cup cranberry juice OR 3 splashes red wine vinegar (only if using ground lamb)
3 bay leaves
1 tsp oregano
1/2 tsp thyme
salt, pepper to taste
2 cups cooked rice

Method:
  1. Heat up a large frying pan on medium-high heat and add some canola oil. brown onion and garlic with the chili flakes.
  2. Add meats and cook until the pink is gone. add rest of veggies and cook on medium high heat until it starts to simmer. Once simmering, turn heat down to low.
  3. Add in herbs and bay leaves and let it cook for 30 minutes, occasionally stirring and trying to mash up softened tomatoes.
  4. Taste and add additional spices if desired. Set aside.
  5. Rinse your green cabbage and remove the first bunch of leaves - The ones on the surface are too big to use for cabbage rolls.
  6. Fill a large pot 3/4 full with water and carefully drop the cabbage inside the pot then bring to a boil. I don't know how the real bubbes do it, but R stabs the cabbage with a large serving fork and boils the cabbage with the fork intact, which makes it easy to lift the cabbage out of the pot again when it's finished.
  7. Once the water starts to boil, reduce the heat and put the lid on the pot, and cook for another 10 minutes or so.
  8. Now remove the cabbage from the pot and start to pull leaves off. This is where I find that it's helpful to work quickly, because the leaves are easier to work with when they're still warm.
  9. To make the cabbage rolls: Put 1-2 tbsp of the meat mixture into a cabbage leaf and fold it like a burrito (see photos), then place it with the seam facing down in a casserole dish. Continue this process for the rest of the leaves until you've used up all of your meat.
  10. In a large bowl, mix together the tomato paste with the water. Add more water if you need to. It should look like tomato soup when it's done. Pour the tomato mixture over the cabbage rolls. It should almost completely cover them.
  11. Cover the casserole dish with foil and bake in the oven at 350F for about 1 1/2 hours.


These get better with time. They're great for lunch the next day (if your co-workers don't shun you for making the microwave smell like cabbage). Baba Luba affirms that they get much better after spending a few weeks in the freezer.

Monday, November 10, 2008

Could I have a blog about Jewish food without mentioning matzo balls? I think not.

In the very first post to this blog, I gave you the recipe and directions for making Baba Luba's chicken soup. Well, I made it again this weekend, and this time I did it right. I made it with matzo balls.

I have to admit: The first time that I had matzo balls, I was disappointed. Before my first Jewish family dinner with R and his family, everybody kept talking about "motza ball" soup and how it was a staple at the dinner table at just about every holiday. Not knowing anything about Jewish food or about kosher laws at this point, I was expecting mozzarella balls in my soup! When I got a fluffy ball of what tasted like bread, I was confused. You can't blame me, can you?

I soon learned that matzo is the substitute for bread during the Jewish holiday of Passover, when eating chametz - ie, bread and leavened products—is forbidden. Matzo balls are made from matzo meal, which is used in place of flour and other grains during Passover. Matzo meal is definitely not a replacement for flour, though. It resembles bread crumbs more than anything. I actually used a mix of matzo meal and bread crumbs in my last recipe for cauliflower latkes, and they could easily be made kosher for passover by using all matzo instead of doing a half-and-half mix.

Matzo balls, once you know what to expect, are fantastic. They make their way into Jewish dinners all year round - Not just on Passover. They're a good substitute for noodles, although I sometimes put both in my chicken soup because I just love carbs that much. Everybody likes their matzo balls a different way. R's brother's mother-in-law likes to make hers so fluffy that they fall apart before your spoon even touches them. R likes his so dense and firm that they weigh as much as my little sister and you'd need a chisel to break them apart.

This recipe yeilds matzo balls that are kind of in the middle. Not too hard, not too soft. Just the way that Goldilocks would make hers.

I got the recipe from the back of the Streit's Mazto Meal box. Why mess with a classic?

Ingredients:

1 cup Streit's Passover Matzo Meal
4 large eggs
1/4 cup oil or melted margarine (I used oil)
1/4 cup of water of seltzer (I used water)
1 tsp salt, or to taste (I added about 1 1/2 tsp in the end)
Pinch of ground pepper.


Method:
  1. Beat eggs. Add water, oil, salt and pepper. Mix well. Add matzo meal and stir thoroughly. Refrigerate for 1/2 to 1 hour.
  2. Partially fill a large pot with water and bring to boil. Moisten palms with cold water.
  3. Form mixture into balls about 1 inch diameter, drop matzo balls into boiling water. When all the matzo balls are in the pot, reduce heat to low. Simmer covered for about 30 minutes or until done. Remove with slotted spoon to a large bowl. Store in a cool dry place. Close spout after use to keep product fresh.


Serve these in chicken soup with egg noodles and garnish with fresh dill. I can't think of a better winter-time lunch than this! It's the ultimate comfort food.


Thursday, November 6, 2008

Cauliflower Latkes


Now that we're into November, it might as well be December. I got my December issue of Bon Appetit in the mail today and there was a whole article about latkes! I do plan on testing a few of their recipes before Channukah, but before we get into that, let me share one of my favourite low-maintainence recipes for anything latke-like: Cauliflower Latkes. If you can get over the fact that making them can make your house a bit stinky, I think that you'll really like them.

It's been a long week for me, so I'm just going to get right into it.


Ingredients:
  • 1 head of cauliflower, cut into small peices
  • 1/2 cup of bread crumbs
  • 1/2 cup of matzo meal
  • 1 tsp of kosher salt
Method:

  1. Place cauliflower in a pot and cover it with water. Bring to a boil.
  2. Boil cauliflower until it's soft enough to easily poke with a fork.
  3. Strain out water in a colander. Place cauliflower in a large bowl and mash it up with a potato masher or a fork.
  4. Add bread crumbs and matzo meal slowly, mixing with your hands. You may not need the whole amount of crumbs/meal. The mixture should be firm enough to form into a ball, but not too dry.
  5. Form mixture into patties about the size of your palm. Place them on an oiled frying pan over medium heat. The amount of oil that you use is up to you. They're crispier when they're fried in a larger amount of oil, and they're softer when they're fried in less oil.
  6. Brown both sides and remove from pan. Place on a piece of paper towel to absorb some of the excess oil.

There you have it! Honestly, I wish that I had more to say about these, but they're pretty self explainitory and I'm exhausted. If you want to see what I've been up to, most of my new work is now up on my website: Robin Sharp Photography.

Enjoy!

Tuesday, October 28, 2008

Baba Luba's stamp of approval.

We went to visit Baba Luba this weekend.

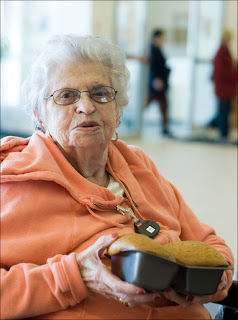
Before we came, R asked her if she'd like us to bring some honey cake. "Just a piece," she said. But I can't make "just a piece" of honey cake, so I made two small loaves instead.

Now here's a funny story about Baba Luba. When R first told her that he was dating me, she certainly had her doubts. To be honest, she was flat out displeased. That's not the funny part, but I don't blame her. Here's the thing about Luba: She's a melodramatic woman by nature. She's very deadpan and she tries to hide her smiles with scowls. She's over 90 years old, but she's still sharp as a Mach 4 razor. Nothing gets by her. She's very difficult to understand sometimes because she speaks about 4 languages fluently and has a mish-mashed accent. Anyway, I understand the desire to preserve the culture, to see your grandchildren marry your friends' grandchildren. I'm just glad that she's since changed her tune.

The first time that I met Luba, I felt that I needed to bring some sort of gift to her. So I made mandelbrot (like Jewish biscotti) from her own recipe. When I offered it to her she seemed sincerely impressed, and took a bite. As she was chewing, R made a joke to her and as she breathed in to laugh, she started to choke. As she choked, she pointed and me and whispered loudly to R in her thick Polish accent, "The shiksa! She tried to kill me!"

Things have changed quite a bit since then, and I've won her over. She asks R about me pretty often now, and she gives me a kiss on the cheek and a hug when she sees me. She loves it when I ask her for help with recipes. Still, I was worried when I brought the honey cake to her because Luba isn't afraid to be honest and I wasn't sure if she would approve of my small variations. But, as the photographic evidence shows, she was quite pleased.


Wednesday, October 22, 2008

1 pumpkin, 3 delicious recipes.


Fall is definitely here, and I've been seeing pumpkins everywhere lately. How could I resist the urge to take a stab at cooking with one?

None of these recipes were borrowed from any kosher recipes or passed on to me by any family members (Jewish or non), so I fought with myself about putting them in here. I really do want this blog to be about Jewish food above all else. The only thing about these recipes that really jives with this blog is the fact that they're all either parve or dairy, so they're not treif. But I just couldn't pass up the opportunity to share these recipes with you all, because they're really great and I'm really proud of how inexpensive it was to make them.

Ask anybody over the age of 50 and they'll attest to the importance of frugality. Kids these days! They throw too much away!

When I knew her, my grandmother Edith fed the squirrels that bounced through her garden. During the depression however, she caught and ate those squirrels for dinner. After moving to Canada from Poland after WWII, baba Luba bought live fish at the market on sale and kept them alive in her bathtub until she was ready to cook them. These women knew what it meant to eat fresh food, regardless of where it came from and whether or not they had to sacrifice their bathing habits to do so.

I think that a lot of us are feeling nervous about the economy these days (I know that my instincts have kicked in and I've started hoarding home made soup in our freezer) and we're looking for ways to save money on our food without compromising our tastes. My financial fears haven't quite reached squirrel-hunting levels, but I still felt a sense of pride when I managed to turn a $2 pie pumpkin into a 3 course meal: Toasted pumpkin seeds as an appetizer, pumpkin gnocchi with sage butter sauce for the main course, and mini pumpkin cupcakes with maple frosting for dessert.

Onto the recipes:

First, let's make the pumpkin puree. I know that it's probably just as easy to get canned pumpkin, but that's just not how I roll. If you want to save yourself some time, I wouldn't blame you for skipping this step and grabbing your can opener instead.

How to make pumpkin puree:

Start with a pie pumpkin. Peel it (I use a vegetable peeler and it's a pain - please let me know if you have a better way). Cut it in half and scoop out the gunk and the seeds. Save the seeds because you'll need them later. Once you've cleaned out the pumpkin, cut it into 1-inch cubes.

Place the pumpkin cubes in a medium-sized saucepan and cover with water. Bring to a boil, then cook over medium-high heat until the pumpkin is soft and tender. Drain and discard the cooking water.

Place the cooked cubes in a food processor and puree.


Now that we've got our pumpkin puree, we can go ahead with the other recipes. Let's start with the easiest one: Toasted pumpkin seeds!


Toasted Pumpkin Seeds:

Carefully remove all of the "gunk" and thoroughly wash the pumpkin seeds that you scooped out while you were making the pumpkin puree.

Pat them dry with paper towel.

Place them on a baking sheet, drizzle with 1/2 Tbsp of olive oil and sprinkle with 2 tsp of kosher salt.

Bake at 400F for 15 minutes, then shake the tray a bit to flip the seeds and bake for another 10 minutes, or until the seeds are golden. Remove from oven and allow them to cool on the sheet.


What next? How about the main course?


Pumpkin Gnocchi with Sage Butter Sauce:

Ingredients:

Gnocchi:

1 1/2 cups pumpkin puree

2 tablespoons butter

1 1/2 cups all-purpose flour

1 large egg yolk

1 teaspoon kosher salt


Sage butter:

1/3 cup butter

1 tsp ground sage (or, if you can get it, 5-6 fresh sage leaves, finely chopped)

1 clove of garlic, minced.


Method:

Heat the puree in a saucepan and add the two tablespoons of butter.

Cook over low heat for 10 minutes, stirring frequently. The pumpkin puree will begin to look slightly dry.

Remove the pan from the heat. Transfer the pumpkin to a large bowl and add the flour, egg yolk, and salt. The mixture should be in the form of a soft dough. Be careful not to knead the dough too much or you'll get tough gnocchi.

Here's where I get lazy. While most people take great care in forming their gnocchi, I get impatient and just want to form them as quickly as possible. I roll small balls of dough into long cylinders (the size of a whiteboard marker) and then cut the cylinders into 1 inch pieces. This seems to work for me.

As you go, place the formed gnocchi on a plate sprinkled with flour.

When you're ready to cook the gnocchi, bring a large saucepan of water to a boil.

Meanwhile, make the sauce by combining the butter, sage and garlic in a small skillet. Place over low heat and simmer until the butter turns golden.

Cook the gnocchi a few at a time in the boiling water until they rise to the surface of the water. Transfer them with a slotted spoon to a warm platter.

To serve, drizzle the gnocchi with the butter sauce, and top with a few grinds of fresh pepper.


And for dessert:

Pumpkin Cupcakes with Maple Frosting:

Ingredients:

1/2 cup unbleached all purpose flour

1/2 cup whole wheat flour

1 1/2 teaspoons baking powder

1/4 teaspoon baking soda

1/4 teaspoon salt

1/2 teaspoon ground cinnamon

1/4 teaspoon ground nutmeg

1/4 teaspoon ground ginger

4 tablespoons softened butter

2/3 cup granulated sugar

1 large egg

1/2 cup pumpkin puree

1/3 cup milk


Method:

Into a bowl sift together the flour, baking powder, soda, salt, and spices.

In a mixing bowl, beat butter and sugar together. Add egg, beating well. Beat in pumpkin puree. Add dry ingredients, alternating with the milk, until well blended. Line 2 muffin pans with muffin liners. Fill each lined cup about 2/3 full.

Bake at 350° for 15 to 20 minutes, or until cakes bounce back when lightly touched in the center.

Mix 2 tsp of maple extract into a can of prepared frosting. You could make your own if you want, but I've never been good at it, so I just cheat and add interesting flavours to prepared frostings now.

Force frosting frosting through a decorator's star tip, if desired, or frost with a spatula.


So there you have it, friends. And in case you're wondering, the pumpkin cupcakes were very well received at my Dad's Thanksgiving dinner. :)

Thursday, October 2, 2008

Honey Cakesters for the Kids.

I had some leftover batter on Monday night when I was making honey cake to take with me to Tuesday night's Rosh Nosh. So I made something fun for the kids:


I called them Honey Cakesters. I think that they were a hit.

Friday, September 26, 2008

Apples and Honey.


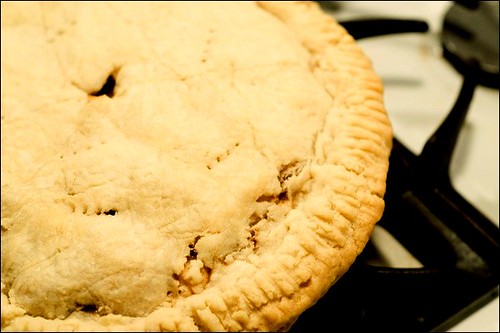
I've been putting this off for quite some time, but Rosh Hashanah is fast approaching and it's time to share one of my favourite recipes of all time: My mom's apple pie.

This may not be the most beautiful pie, and it may not be the world's most unique recipe, but I love it. This is the pie that I ate every Sunday night as a kid, along with a cup of decaf earl gray tea (my tea habit started young), while watching America's Funniest Home Videos (Bob Saget era) with my family. There are few foods in the world that are more comforting for me to make and eat. When I have a family, this will definitely be a regular fixture at our Rosh Hashanah dinner table.

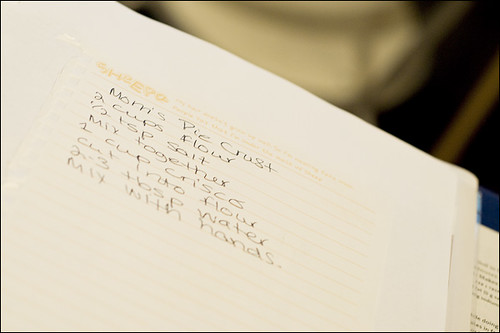
When I first moved away from home, I used to make this pie as an excuse to call my mom to ask her for the recipe. I never wrote it down. There were so few ingredients and quite a large margin for error. I always thought that I'd be able to remember it. But I never did. Finally, after 2 years of calling to ask for the recipe on a monthly basis, she begged me to write it down:

(My hand writing is quite a bit nicer than R's, isn't it?)

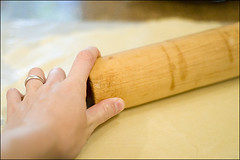
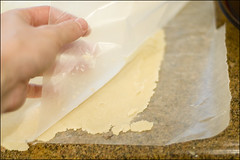
It really is that easy to make this pie crust. And I'm about to show you one of the best tricks I've ever learned in the kitchen: You can avoid a lot of mess by rolling your pie dough between two sheets of waxed paper.


Just sprinkle the paper with a bit of flour, put your ball of dough in the middle, put the second piece of paper on top, and roll away. It's even easier if you tape the paper to the counter so that it doesn't slide around when you're rolling it. Got it? Remember this method, because we'll use it in a second.

Now, when we start to talk about filling things get a bit foggy. I don't think that my mom ever had a written down recipe for pie filling and I know that I don't. I know the basic ingredients and I usually just toss them all in the bowl together and taste bits of apple as I go along, adding ingredients until it tastes right.

But for you, I've written down some measurements.

So here we go.

Sandi's apple pie:

Ingredients:

Crust:
2 cups all purpose flour
1/2 tsp salt
1 cup Crisco
2-3 tbsp cold water

Filling:
5 apples, whatever is in season. (I used Macintosh)
1 tbsp lemon juice
1 cup brown sugar
1/4 cup white sugar
1/4 cup honey
2 tablespoons flour
1/2 tsp ground cinnamon
1/2 tsp ground cloves
1/4 tsp ground nutmeg


Method:
1. In a large bowl, mix together the flour and salt for the crust.
2. Add 1 cup of Crisco, cut in with pastry cutter.
3. Add 2 tbsp of cold water, mix with hands. If the dough is still crumbly after kneading 6 times, add 1 more tbsp of water.
4. Divide dough into 2 balls and set aside.
5. Preheat oven to 400F.
6. Peel and slice apples into 1x1 inch cubes.
7. In a bowl, mix apples with lemon juice. Add remaining ingredients. Mix well. Set aside.
8. Between two pieces of waxed paper, roll out one of the two balls of dough created in step 4.
9. Carefully remove paper from one side, place paperless side down into a greased pie dish. Remove paper from other side.
10. Spoon filling into pie.
11. Between two pieces of waxed paper, roll out the other ball of dough. Carefully remove waxed paper from one side, then place paperless side down on top of filled pie. Remove paper from other side.
12. Trim remaining dough from edges, then press edges together with a fork.
13. Poke holes in the top of the pastry to allow air to vent during baking. This will keep your pie from bubbling over.
14. Place in oven for 50-60 minutes or until filling is bubbling slightly and crust is golden brown.
15. Remove from oven and cool for at least 20 minutes before serving.


Conveniently, my mom's pie crust recipe is made with Crisco, which is parve! I do tend to bake with butter, so many of my favourite deserts are dairy based. However, both this recipe and the honey cake that I posted last week are parve, so you can bring them to any dinner knowing that they'll be welcome additions to the table.

That's all from me until after the High Holidays, so L'shanah tovah - to a sweet new year.


Friday, September 19, 2008

Honey cake for a sweet new year.


Fall is definitely coming. On Sunday, Toronto had its last heat wave of the season. This week you can smell the change of the season in the air. It's easier to breathe now. The sweaters are coming out.

With fall comes Rosh Hashanah, otherwise known as the Jewish New Year. My very first Jewish holiday celebration was a Rosh Hashanah dinner at R's brother's house. I brought a homemade apple pie from my mom's recipe, since I was told that apples and honey were symbols of the holiday. I'll post a recipe for that soon, since I think that it is a fitting dessert for the Rosh Hashanah table.

One of the first Jewish religious practices that I participated in was the dipping of apples in honey, which is a symbol of a wish for a sweet new year. Since honey is a symbol of Rosh Hashanah, this week's recipe should come as no surprise.
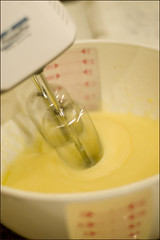
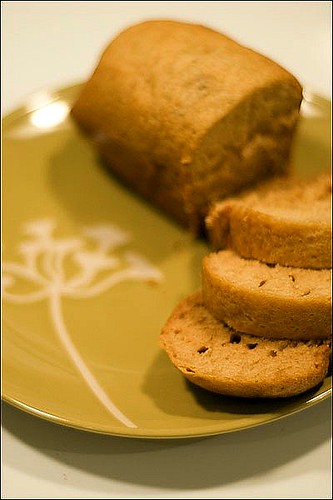
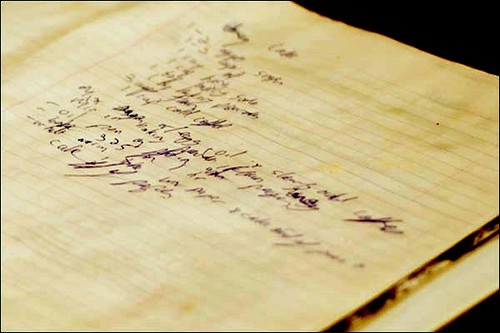
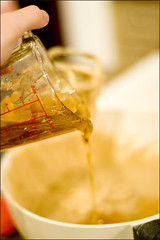
Last night, I attempted to make honey cake for the first time. It's always scary for me to make something from a recipe that hasn't been tested, especially since this time I was going on a recipe that had been printed out in R's chicken scratch, translated from his baba's recipe that she gave to him over the phone many years ago.
I love Baba Luba's recipes. They never involve real measurements or directions. There are no standards. It's always, "You take some sugar, and you mix it with an egg and some oil. You add the coffee and you mix. Add the flour and baking powder and mix more. Put in some honey. Put it in the oven and cook it until it's done."

From that, R got this:


Which I had to translate to this:

Ingredients:
2 eggs
1 cup sugar
1 cup oil
1 cup strong coffee or espresso (cold)
3 cups flour
1 tsp baking soda
1 tsp baking powder
1 cup honey

Method:

1. In a large bowl, beat the eggs. Add the sugar and oil, and mix until smooth.
2. Slowly add the coffee/espresso, mixing as you go.
3. Add 1 cup of flour, the baking soda and the baking powder. Mix, then slowly add the remaining 2 cups of flour.
4. Add 1 cup of honey. (At this point, if you were using a hand mixer, I recommend putting it down because the batter is going to get really thick and sticky.)
5. Mix in the honey by hand.
6. Pour batter into a loaf pan lined with parchment paper (or a greased non-stick pan).
7. Bake at 350F for 1 hour, or until a toothpick poked into the middle of the cake comes out clean.


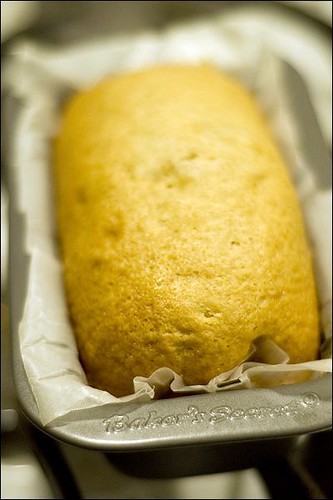
Before baking this cake, I had only tasted honey cake once in my life. Last time I had it it was store bought. This time it tasted so much better, and I don't think that it was just my sense of accomplishment that made it taste so sweet. This is definitely a good cake to have with coffee after dinner, or as a rather unhealthy companion to your morning latte. When I make this again to bring for Rosh Hashanah dinner, I'm going to attempt to make some sort of honey glaze, and I might try decorating the top of the cake with sliced apples. Wouldn't that be cute?


Monday, September 15, 2008

Mastering the art of Kosher Cooking.

So why am I starting this blog?

I guess that it's best to start with the food part. I was raised in a secular household. Cooking and baking was always very important to my mom. Instead of buying cookies and granola bars from the grocery store, she used to bake them herself. Kids at school were always so jealous of my lunchbox. I got beat up more than once for those granola bars. And every Sunday the house would fill with the smell of the oven as she would make roast beef with mashed potatoes and gravy, followed by a fresh pie (usually apple).

So it's no wonder that I grew up to enjoy baking and cooking. I enjoyed food so much that I eventually became a professional food photographer.

Three years ago, I met a boy. We liked each other. Then we loved each other. Two months ago, we got engaged. I had known since we started dating that he was Jewish and wanted a Jewish family. So when he proposed, I signed up for conversion classes.

Since I started dating my wonderful fiance, I've had the chance to participate in many Jewish holiday celebrations, and in the meantime I've been able to enjoy some seriously amazing Jewish food. I love that so many dishes have a story and a tradition. Eastern European Jewish cuisine really appeals to me and my love of meats, sweets and starches. Naturally, after tasting something that I like, I need to know how to make it. Then I usually attempt to recreate it in my own kitchen. As a result of this, and as a way of understanding the culture that I was marrying into, I began to cook Jewish food shortly after I started eating Jewish food.

Yesterday, after successfully recreating R's baba's chicken soup, I got to thinking: What if I turned this little hobby of mine into a project? What if I were to document these attempts at learning to cook like a bubbe?

Of course, it only made sense to create a blog. Who doesn't have a blog nowadays?

I should clarify that this blog might not follow all kosher laws. I suppose that it's more like kosher style than anything. I am learning about keeping kosher, but it's a process and I may not always know the rules, especially at the beginning. That being said, if you aren't familiar with kosher cooking, I hope that you'll enjoy learning with me.

To start, here is Baba Luba's chicken soup recipe:

Ingredients:
1 whole chicken
1 carrot, peeled
2 stalks of celery, leaves removed
1 whole peeled onion
salt, pepper

Method:
1. Fill a soup pot halfway to the top with water. Add 3Tbsp of salt. Bring to a boil.
2. While waiting for the water to boil, cut the whole chicken into quarters and remove the skin. Reserve the neck and any giblets - They'll give the soup lots of flavour.
3. When the water is boiling, add the chicken, carrot, celery and onion. Continue to boil for 10-20mins, stirring often, skimming off any foamy residue that comes to the surface.
4. Reduce heat to low, cover (leaving a tiny crack for steam to escape) and simmer for 3 hours, longer if you have the patience. Stir occasionally.
5. Add salt and pepper to taste. I also added some powdered thyme, and you might like to add some rosemary too.
6. Simmer for another 20mins.
7. Remove from heat. At this point you can either strain the soup to get a clear broth, or you can break up the vegetables and chicken and leave them in the soup, removing only the chicken bones, the neck/giblets, and the onion.

I would have taken pictures of the process, but at the time I wasn't thinking about posting this as a blog entry. Next time there will be pictures, I promise.